Wednesday, January 30, 2013

DIY Stamp

Today I'm going to show you how to make your own custom stamp. Its super easy and a great way to personalize anything!

custom diy stamp

Here is what you will need: craft foam, a block of wood, pen and scissors.

custom diy stamp

On the foam draw a design. I did mine free hand but you can also find one online to trace. 

custom diy stamp

Cut out your shape or design. Now you are ready to glue the foam to the wood.

custom diy stamp

Let dry for about 30 minutes and your are ready to stamp your little heart out!

custom diy stamp

Happy stamping!


Thursday, January 17, 2013

Pom Pom Garland

Pom pom seem to be my new obsession  They are cute and I love making them. Today I made some to decorate the house for valentines day! Here is how to make yarn pom pom garland...

yarn pom pom garland

You will need a few skeins of yarn in your choice of colors and a pair of scissors.

yarn pom pom garland

First I wrapped the yarn around my hand ten thousand times...kidding but I did do it a lot. I cut a small piece of string, slipped it through my fingers and tied it off tightly. I then slid the whole thing off my fingers.

yarn pom pom garland

After its off my finger and tied off tightly  its now time to cut the pom pom fringe. At first you have lots of loops like shown in step 1. I run my scissors through the loops cutting little sections at a time. Step 2 is showing just after I cut all the loops apart. It looks a little crazy and untamed  Now we trim these little pom poms up just by cutting the longer pieces off so they will look like step 3. You can trim a little or a lot off the pom pom in this step. 

yarn pom pom garland

For the next step I have 15 pom poms...3 in each color ready to string to make the garland. You will need scissors  a large needle and some yarn or string. 

yarn pom pom garland

I threaded the needle but haven't cut the string off the spool yet. I threaded them all on first and then cut once I could see how much I needed. There is no rhyme or reason to threading just aim for the center of the pom pom.

yarn pom pom garland

There you have it. Pom pom garland made out of yarn! I decorated the end of our bed with it but this is a project that would be perfect for a fireplace mantle!

yarn pom pom garland

Happy pompoming and let me know if you have any questions by emailing me at noelleaustinblog@gmail.com 

Wednesday, January 16, 2013

DIY Placemat


Placemats are whats happening today on the blog. They are super easy and adorable. You can make them with any fabric that coordinates best with your style I just love stripes:)


Placemats tend to range from 12"-14"X16"-20". I picked a size right in the middle...14"X18". The interfacing I'm using is just extra I had from another project. It's lightweight and is iron on, on one side. I cut the fabric out in one big rectangle (28X18) and then cut it in half to make two rectangles.  


I ironed on the interfacing to the back of one of the pieces of fabric. Weird fact... I love doing this step, its weird I know!


Putting right sides together, pin and sew around all four sides. But don't forget to leave an opening so you can turn it right side out. Mine was about four inches


I turned the placemat right side out and ironed it. 


This is the opening nice and pressed. Now you are going to top stitch close to the edge to close the opening and to make it look pretty!


I made two with this project because we are just a family of two. I am super excited to us them tonight at dinner! Hope you enjoyed!

Friday, January 11, 2013

Simple Stromboli

This recipe is very simple an husband approved! It is always nice when your husband says "this taste awesome babe!"


To start the dry ingredients are:

1 package of fast rising yeast
2 ½ cups of flour
1 teaspoon of salt

Mix yeast, 1 cup of flower and salt together


The liquid ingredients are:

1 cup of water 
1 table spoon of olive oil

In separate bowl mix water and oil together. Then microwave for 1 minuet 30 seconds.


Combine ingredients and stir. Slowly add the rest of the flour.


Once most of the flour is mixed in kneed. After it has reached a dough like consistency, let sit for 30 minuets. 


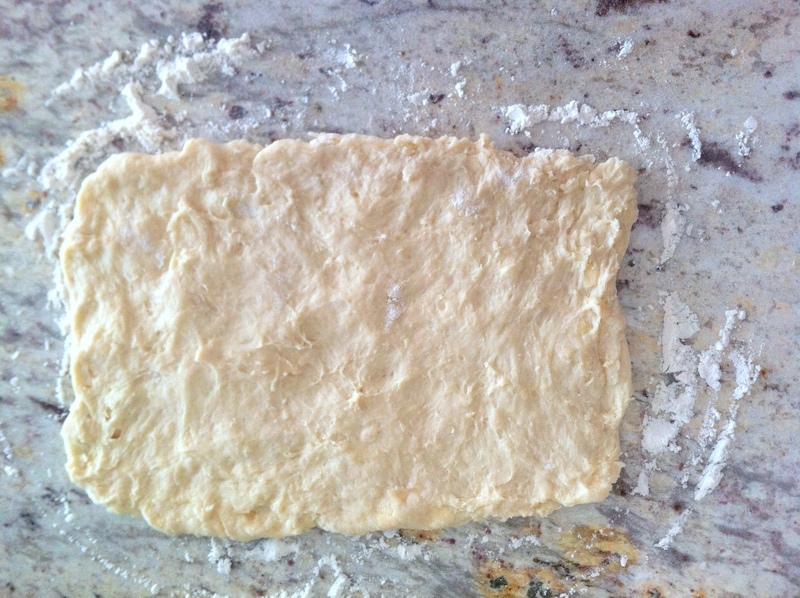
With flour on a clean surface  make a rectangle with the dough. I do this just by pressing it out with my fingers. Add flour to your fingers if the dough is sticking.


The toppings I chose are spinach, tomato sauce, cheese, and pepperoni. You can really add anything you like such as onion or tomato slices.


When you have your desired toppings, cut a 1 inch slices of dough on either side of your toppings.


Fold the two ends of the dough first then start on one side bringing the dough sections together. Top with some melted butter before putting in the oven. 


Bake at 350 for 30 minutes or until done. The one I made was a personal size approximately 7 inches by 3 inches. If yours is bigger you may need longer cook time.

Wednesday, January 9, 2013

Quick, Simple and Inexpensive Vase

Those are my three favorite words...quick, simple and inexpensive ..ok maybe not my favorite but I do like them. I am a total fan for quick projects. And this one is one of them.


I purchased this vase at the dollars store and paint at Michaels craft store making this project total $2.50! This is my kind of project.

For the project I used gold paint.  I'm on a gold kick for some reason but you can use any color you would like:)


I started by squeezing some paint inside the vase and the just moving the vase around to spread the paint around. You can always add more if you need more paint.


I ended up swirling the paint around until i almost reached halfway up the vase. This is a preference thing so you can do more or less. Then let it dry and your done. It's not even very messy which is an extra bonus!

Hope you all are having a fantastic Wednesday!

Thursday, January 3, 2013

Canvas Art


Today I bring you some simple and cheap canvas art. The whole project only cost me 10 dollars! I found the 2  small canvases at the local craft store and had a 40% off coupon. Score! Here is what you will need.


I first started out by creating my design. I drew both of mine free hand on scrap piece of paper and them traced the design on to the canvas. You can always find an image online instead if that's more your speed.


Once my image is traced on to the canvas I mod podge the traced area and sprinkled my first layer of glitter all over it. Note: I put the canvas under an extra sheet of paper so once try I could put the extra glitter back into the container.  I repeated mod podge and glitter step three times. So it went something like this: mod podge, glitter mod podge, glitter etc.  My final layer is mod podge to seal the glitter to the canvas.


That's it. Like I said its super easy and I love making them. I'm already thinking of other images I could use. Like if you were decorating a nursery or kitchen. I hope you have as much fun as I did and let me know if you have any questions!


Related Posts Plugin for WordPress, Blogger...
Blogging tips